After a period of immobility, the motorcycle deteriorates quickly, and the damage done to the carburetor is particularly serious. When deteriorated fuel clogs and alters the jets and air passages, it can go bad in certain areas or even prevent the engine from starting. When this happens, check the inside of the carburetor and if it is badly contaminated, a full overhaul is necessary.
- Fuel that has decayed over time is a carburetor’s worst enemy.
- POINT
- Key Star fuel kits may address discontinued OEM parts
- POINT
Fuel that has decayed over time is a carburetor’s worst enemy.
Even in parking lots with roofs and walls, do not be careless when storing for long periods of time. If fuel remains in the fuel tank and carburetor halfway through storage, it can deteriorate and produce a strong, nose-piercing odor when the tank cap is opened. For planned long-term storage, both the tank and the float chamber should be emptied. It is even safer to clean the fuel adhering to the inside of the carburetor with parts cleaner.
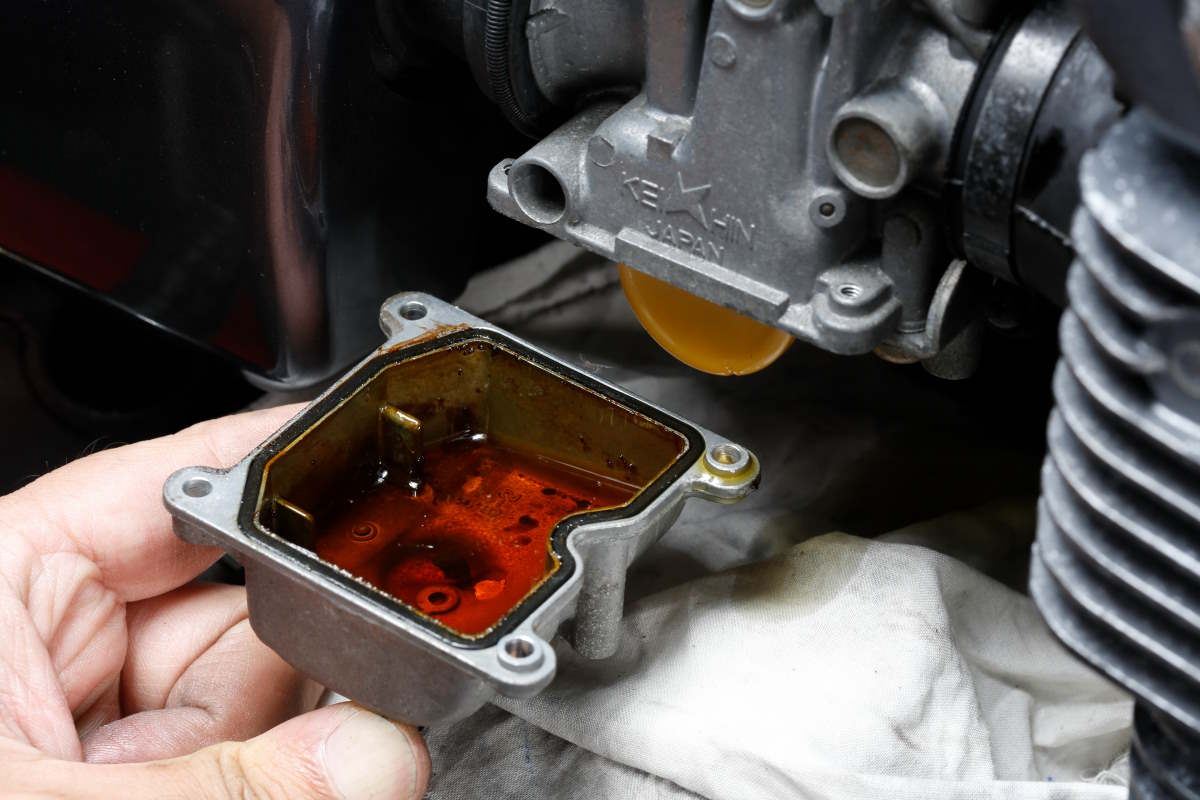
Perhaps because the area was not exposed to sunlight and temperature changes were minimal, the fuel in the float chamber has turned brownish brown without volatilizing, although the oil level has dropped. Varnish was produced during the volatilization process, and the inside of the chamber is discolored as if it had been varnished. The smell is also very strong. Naturally, the strange odor is also great.
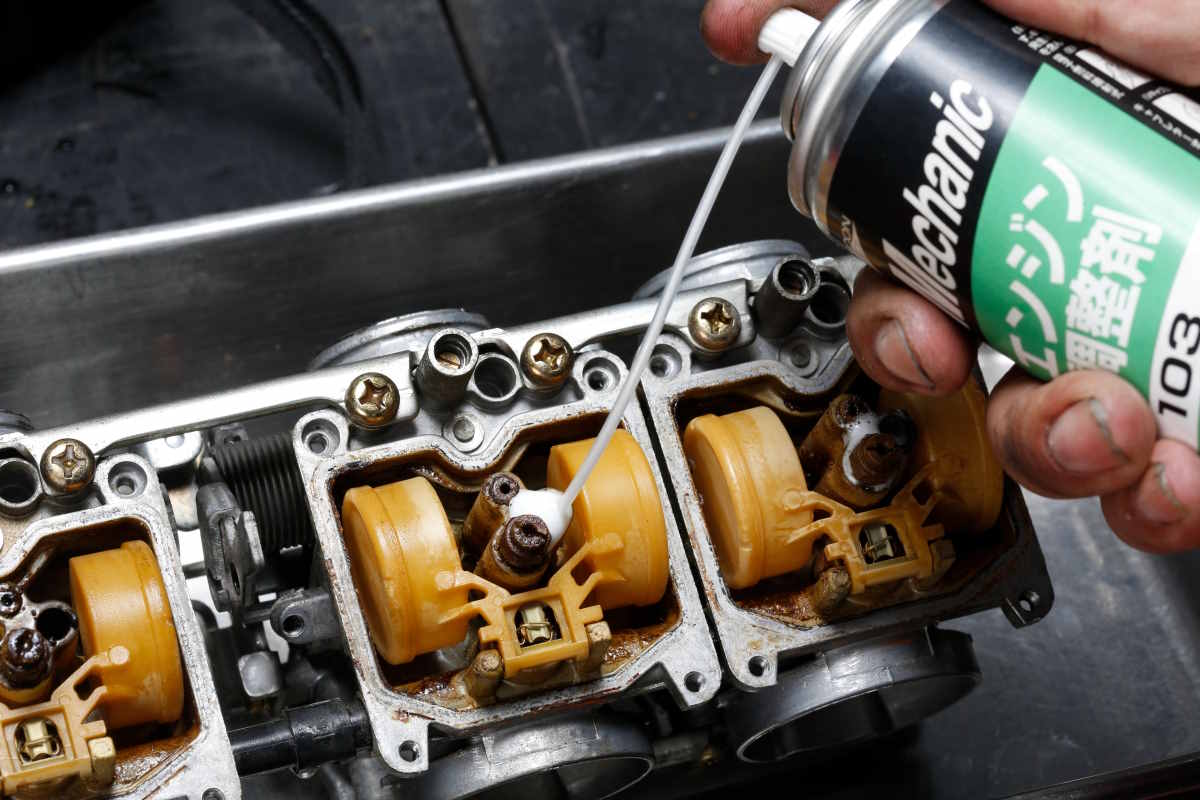
Spray foam-type carburetor cleaner on visible parts to dissolve sticky fuel stains. Since regular parts cleaners only remove surface dirt, a highly penetrating carburetor cleaner is a necessity.
Spraying cleaner from the outside will not help because all the fuel that has gone through the jet holes as well as the jet holders and the passages in each part of the body has deteriorated. All parts that can be removed must be removed and thoroughly cleaned.
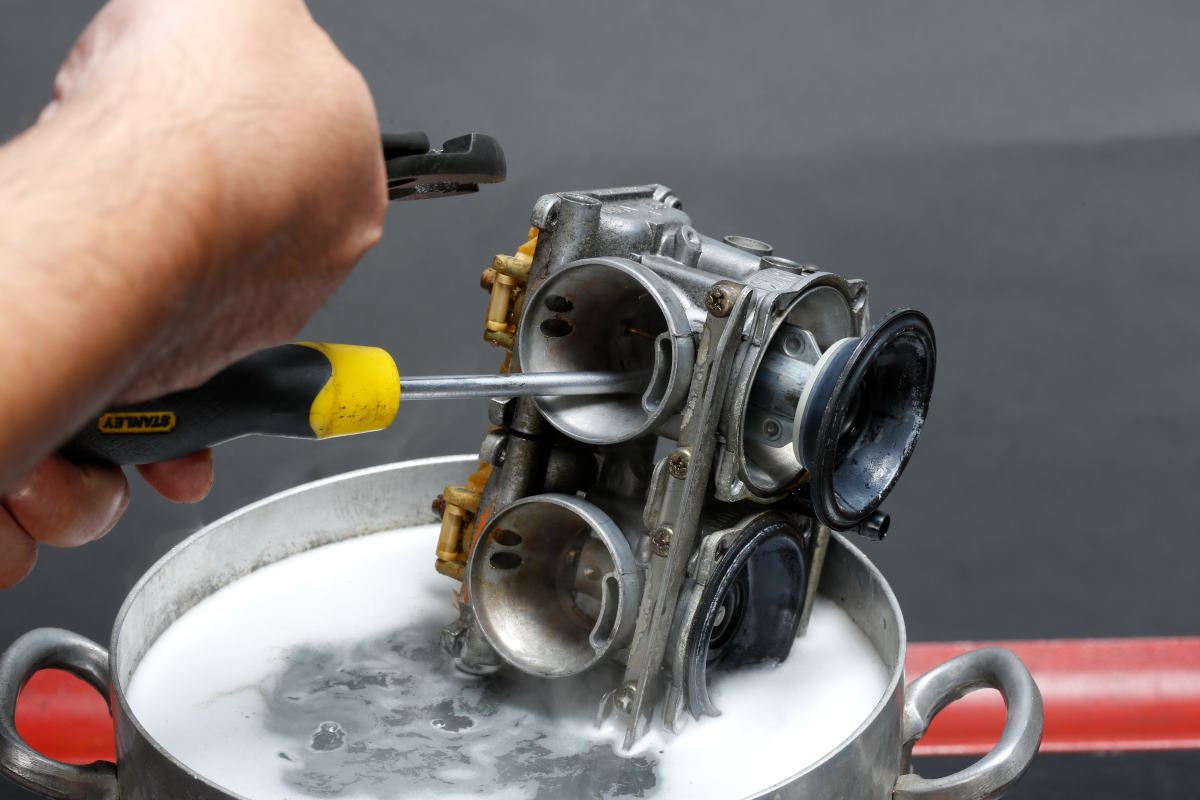
Another typical symptom of a neglected carburetor is that the deteriorated fuel acts as an adhesive, causing the body and piston to stick together. Forcing to pry at room temperature will cause scratches and distortion, so warm water with neutral detergent and gradually pull out the piston to avoid scratching it. Heating is also effective when the float valve is stuck in the valve seat.
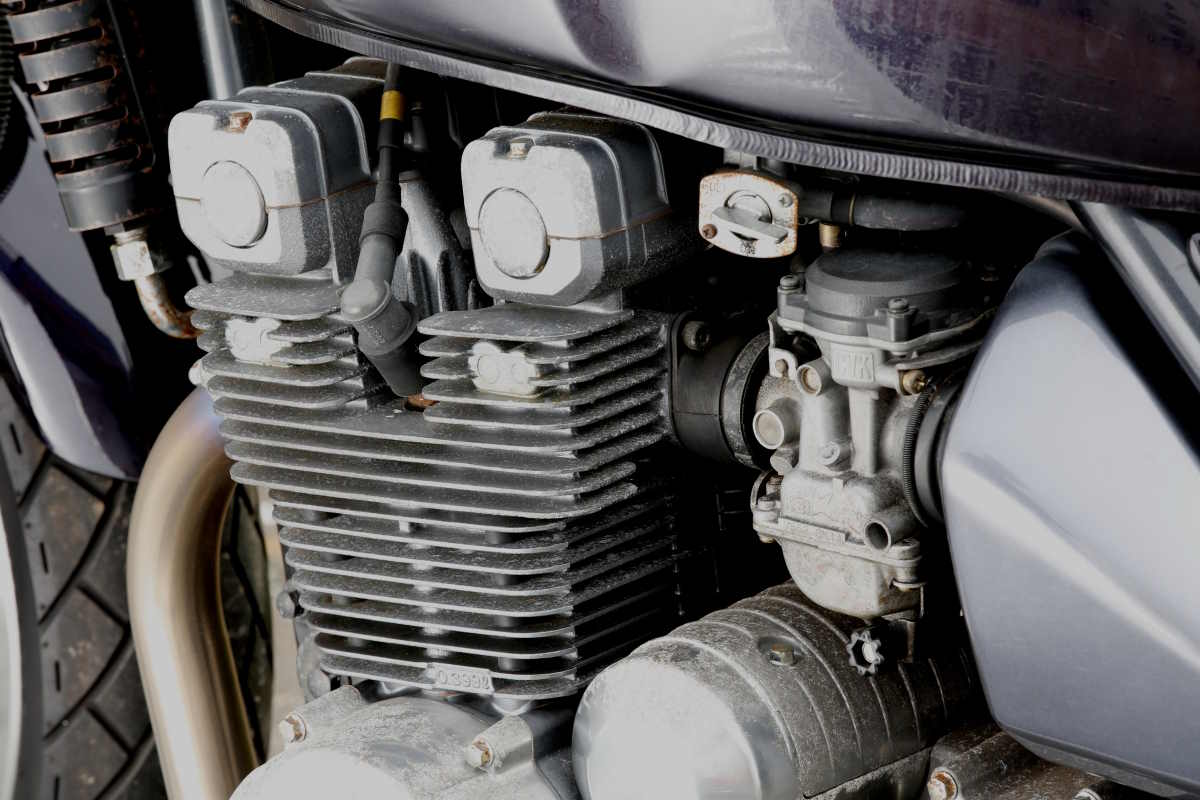
While riding the bike on a daily basis is fine, the condition of the bike deteriorates quickly after a period of immobility. By the time the tires run low on air and the battery runs high, it is not uncommon to lose the energy to maintain the bike and enter a period of several years of immobility.
Deterioration of fuel left halfway inside the fuel tank or carburetor causes varnish and corrosion, which can lead to rust in the tank and block the passageways of the carburetor.
Varnish and corrosion are both troublesome, but if the fuel volatilizes and becomes resinous and sticks to the tank like glue, disassembly for cleaning and overhaul will be difficult.
The most effective way to revive a so-called “rotten carburetor” with deteriorated fuel permeating the inside of the carburetor is to do a full overhaul = take it all apart and clean it.
If the contamination is mild, it can sometimes be cleaned with a spray-type Chemical.
However, if the fuel has aged until it emits a peculiar strange odor, it is better to completely disassemble it for later use. Even if a half-hearted cleaning seems to have temporarily restored the system if the dirt that could not be removed remains in the fuel passages, the air-fuel ratio may become thinner due to lack of fuel, and with the air passages halfway blocked, the air-fuel ratio may become thicker and foggier.
The combination of deteriorated fuel and age can also cause rubber parts to deteriorate.
Most four-carburetors have a fuel joint pipe that connects adjacent float chambers, and a rubber O-ring is incorporated where the pipe is inserted into the carburetor to prevent fuel leakage.
Although deteriorated O-rings manage to maintain their sealing properties while soaked in fuel, fine cracks can develop and cause fuel leaks when they are degreased and cleaned with carburetor cleaner or other chemicals. To replace the O-rings in the joints, it is necessary to disconnect the connected bodies.
Also, if the starter plunger used for starting in a 4-carburetor carburetor operates laterally, it cannot be removed and cleaned without disassembling the linkage. If the starter plunger is forced to operate with deteriorated fuel on it, there is a risk of damaging the plunger or the carburetor, so it is also essential to replace the fuel joint O-rings and disassemble the plunger for maintenance.
It goes without saying that slow jets, main jets, jet holders, and jet needles with clogged or corroded holes also need to be cleaned, but it is also good to know that other work may be required.
POINT
Point 1 – If fuel is left in the float chamber for a long period of time, it may deteriorate and clog the inside of the chamber.
Point 2 – Dirty carburetors should be cleaned internally and deteriorated rubber parts should be replaced.
Key Star fuel kits may address discontinued OEM parts
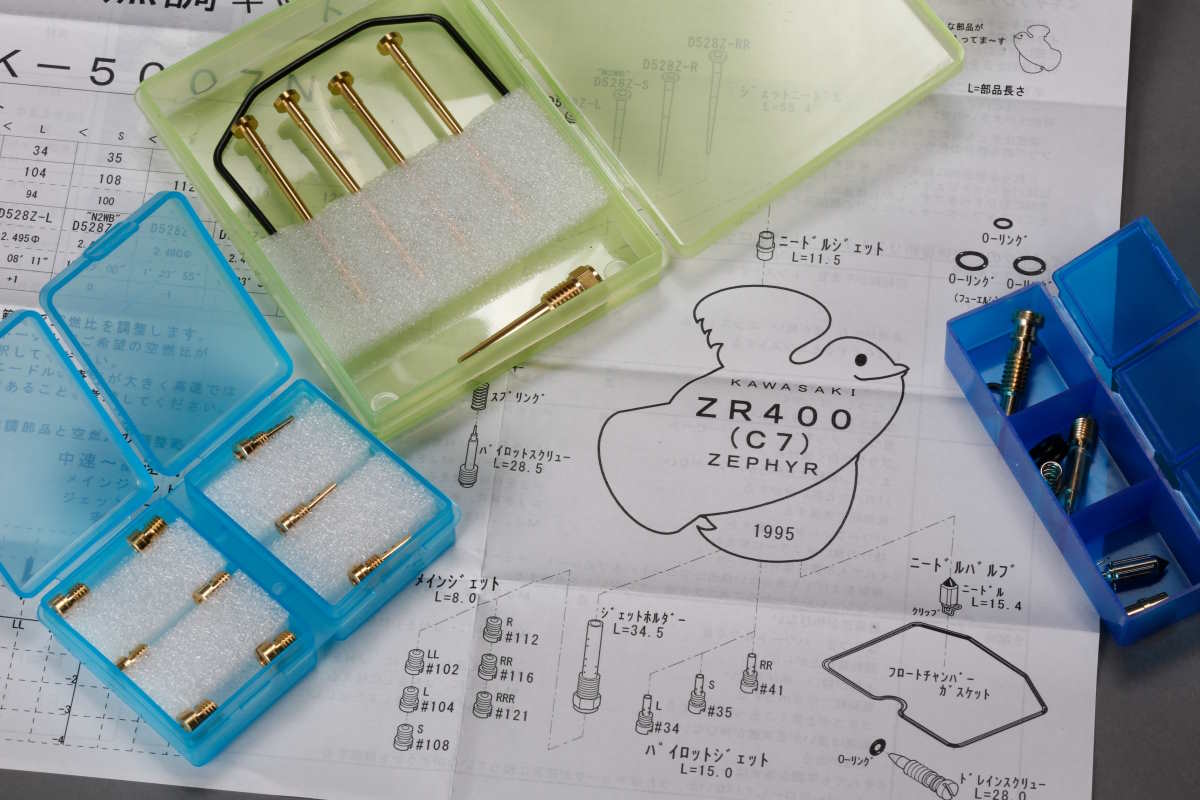
Key Star has built a lineup of fuel adjustment kits for over 500 models from mopeds to large vehicles.
The Zephyr 400 carburetors have different settings for the #1#4 and #2#3 carburetors, so there are two types of fuel adjustment kits, one for the #1#4 carburetor and one for the #2#3 carburetor. One fuel adjustment kit consists of parts for one carburetor, so two kits are required for both #1#4, and #2#3. The price is 4,400 yen per kit (tax included).
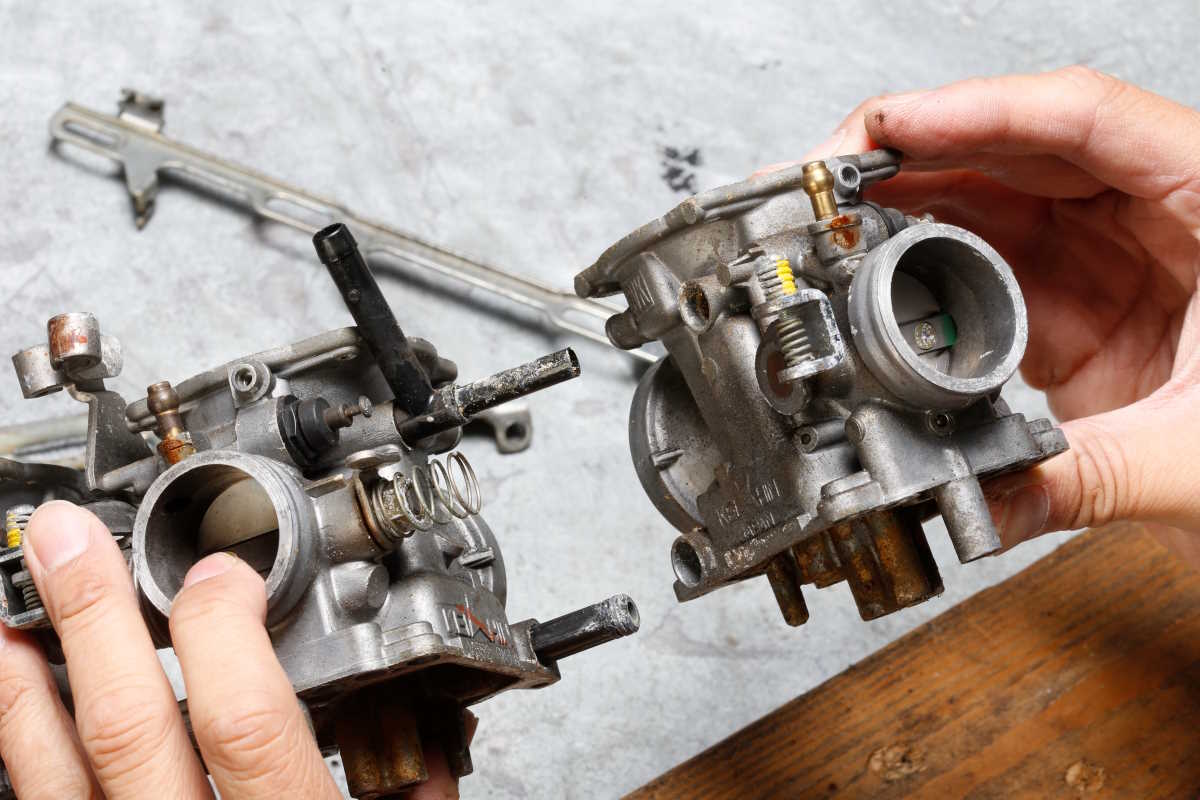
To replace the starter plunger, fuel joint, and vent pipe O-rings, the four connected carburetors must be separated.
The linkage is not easy for beginners because of the complicated structure of the linkage and the need to adjust the synchronization after connection, but the O-rings of the fuel joints should be replaced because deterioration of the O-rings is a major cause of fuel leakage.
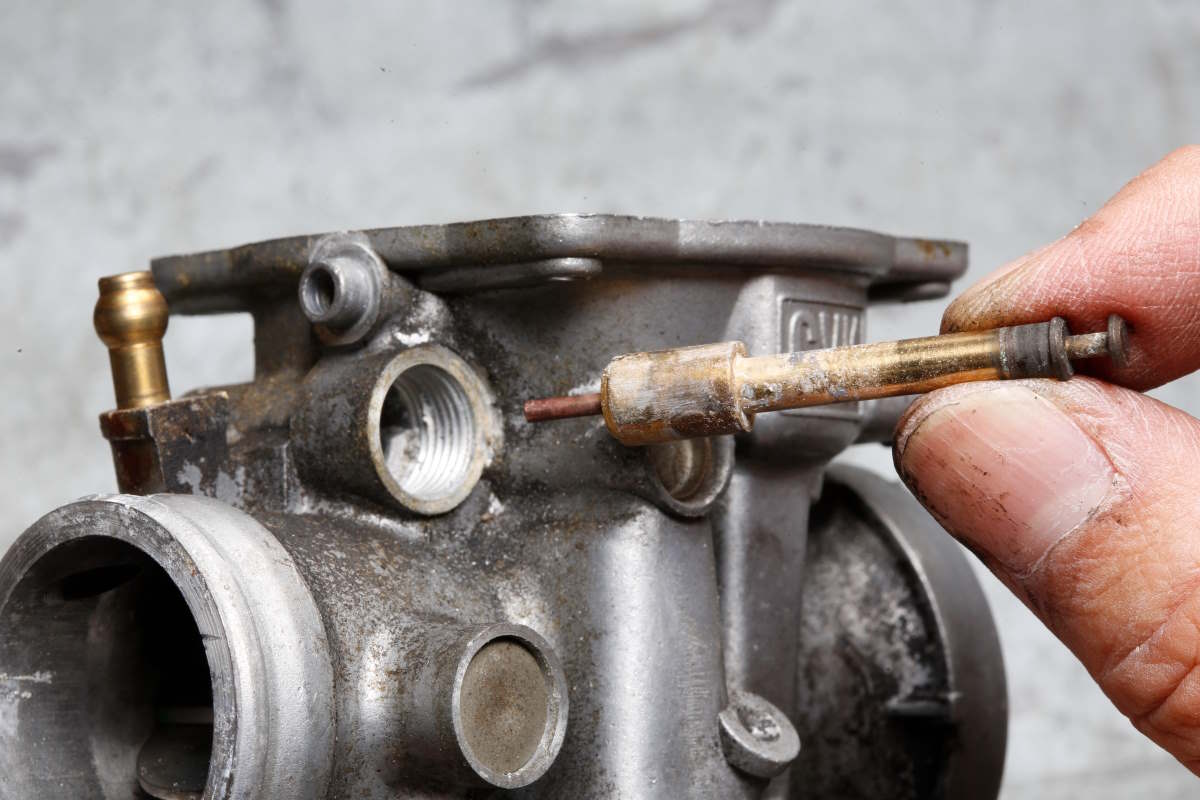
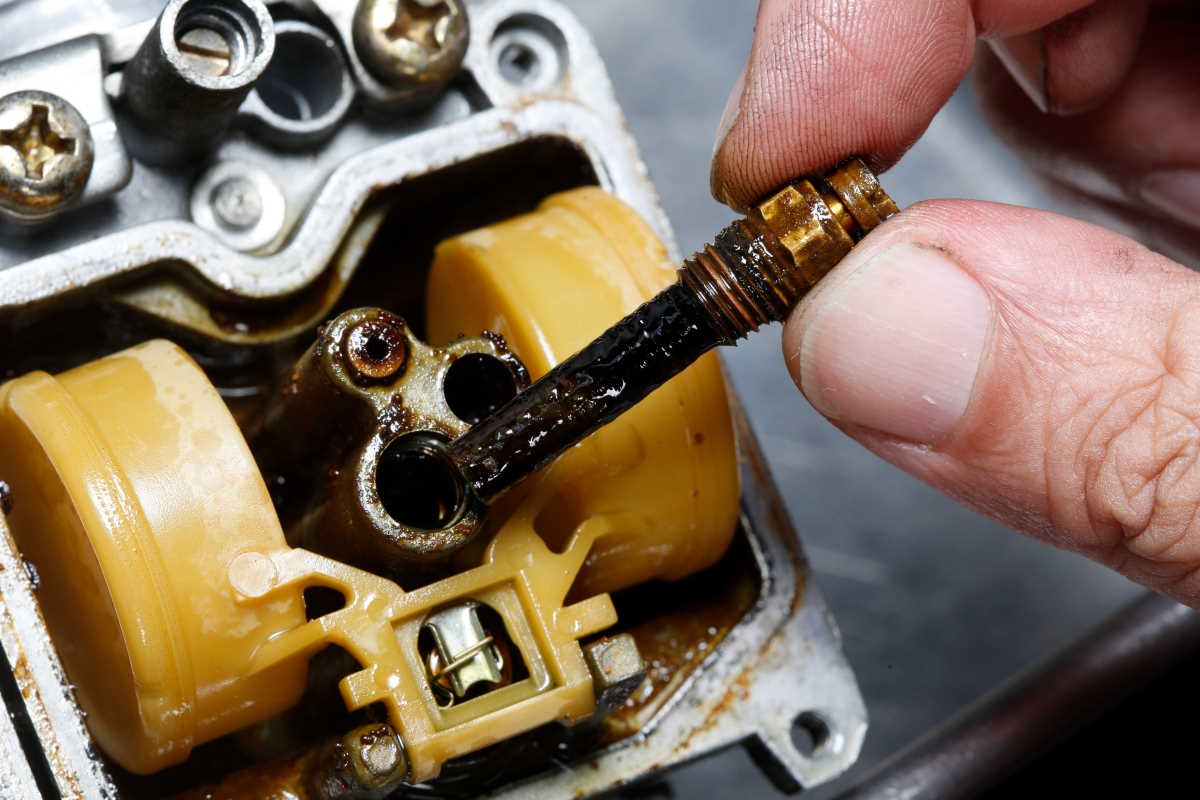
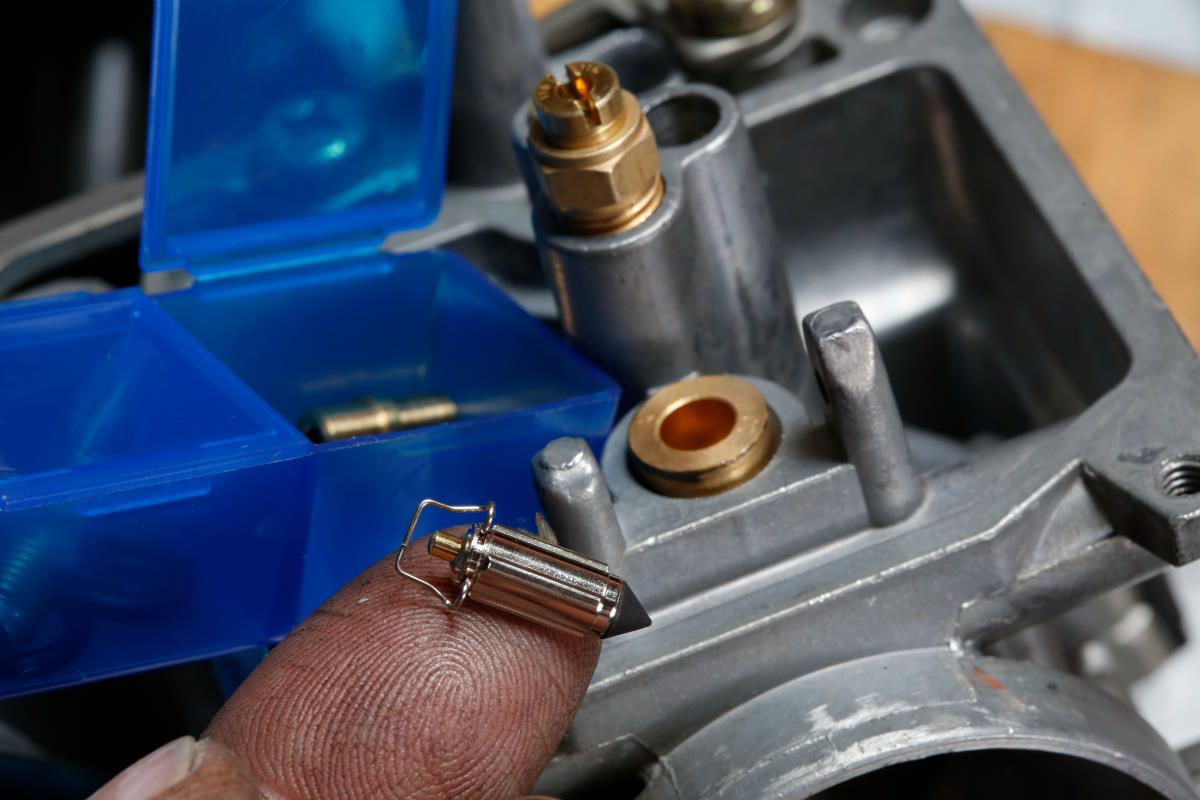
This is the starter plunger. When the choke lever in the handlebar switch section is operated, the plunger is pulled out to supply the fuel needed for cold starting.
Deteriorated fuel causes damage to the body and plunger as shown in the image, and when the rubber at the tip hardens, fuel continues to flow even when the choke is pulled back, affecting the air-fuel ratio, so cleaning and plunger replacement is necessary. The fuel adjustment kit for Zephyr includes a plunger.
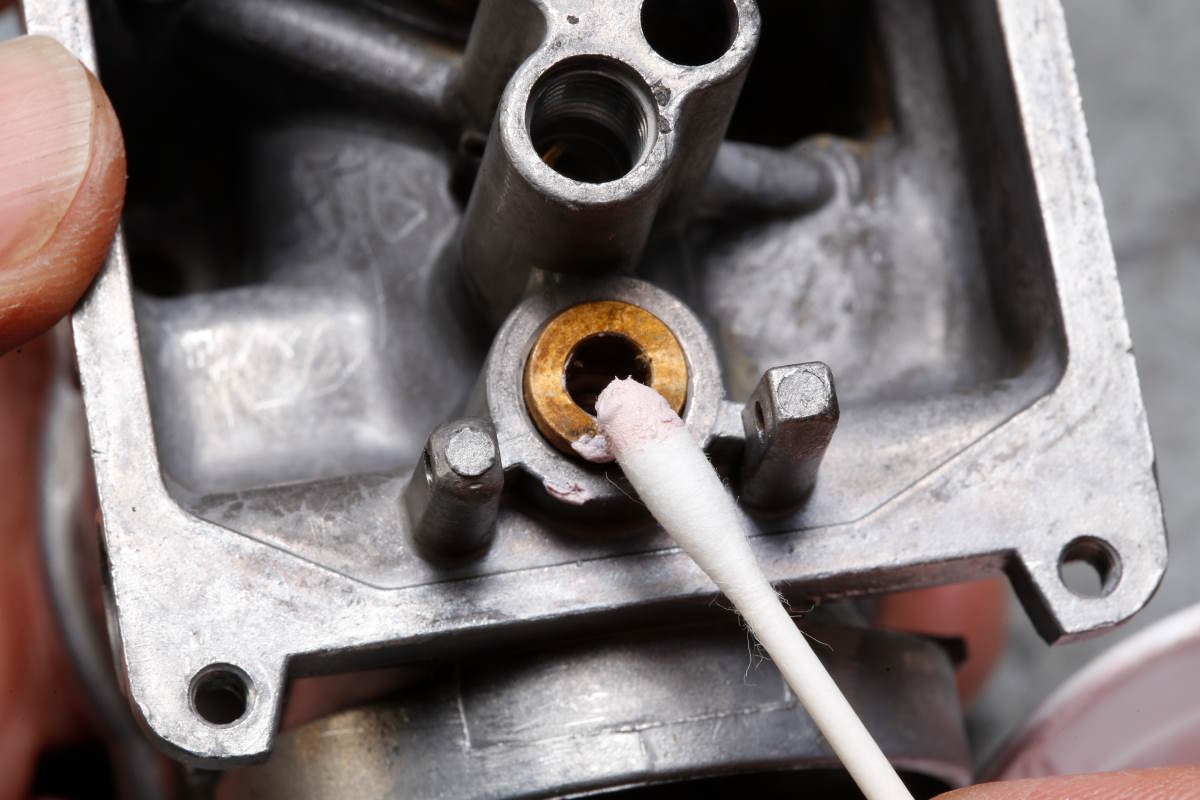
There are two types of valve seats assembled in the carburetor: removable and press-fit. The Zephyr carb in the image is a press-fit type that cannot be replaced, so it is cleaned by applying a metal compound to a cotton swab and rubbing it against the surface of the float valve. The float valve and valve seat are tightly sealed together. If the float valve and valve seat do not adhere closely, the oil level will not be stable and the valve will not perform as it should.
Stabilizing the fuel oil level in the float chamber is the first requirement for carburetor setting, and the float valve is super important. The float valve of the fuel adjustment kit uses a rubber needle (AA needle) that is not easily deteriorated by the ethanol contained in the fuel. Float valves that have been used for a long time may develop linear marks on the contact surface with the valve seat and lose their sealing ability, so they should always be replaced for long-term immobilized vehicles.
There are two hurdles to overcome when completely overhauling a carburetor on an discontinued motorcycle (although all cars with carburetors are discontinued, to begin with).
One is the problem of discontinued sales of OEM parts. Although it varies from model to model, OEM parts for old and out-of-print cars are being discontinued at an accelerating rate, and carburetor repair parts may not always be available. Another hurdle is the price of parts. While it is certainly nice to have a supply of parts needed for repairs and overhauls, picking up the smaller parts inside the carburetor can often be more costly than expected.
OEM parts are automatically subject to price revisions the longer they are held by the manufacturer, which can lead to surprisingly high prices for older models. If you can get all the parts you need with OEM parts, that’s great, but when you can’t get all the parts you need, you can rely on the fuel adjustment kits manufactured by Key Star, a specialized carburetor manufacturer. It offers a lineup of as many as 500 models from the 1960s to the 2000s, all at nearly the same price (which may vary depending on the part contents) and more reasonably priced than OEM parts.
The fuel adjustment kit features a set of slow jets, main jets, and jet needles in multiple sizes to allow carburetor setup with the stock carburetor, but also includes parts for maintenance and overhaul such as float chamber gaskets, float valves, pilot screws, starter plungers, and O-rings. and other parts useful for maintenance and overhaul are also included. For users who only want to do carburetor setting, this may seem like an unnecessary item, but carburetor cars of the early 2000s have already been in production for nearly 20 years, and rubber parts such as fuel joint O-rings and float chamber gaskets have been aging. Therefore, it is effective to replace them as preventive maintenance.
A full overhaul is essential to clean rotten fuel, and while jets and needles may be a reusable thorough cleaning, it is also essential to replace rubber parts such as float chamber gaskets and fuel joint O-rings. If OEM parts are not available, or if you want to obtain all the necessary parts for overhaul at once, you can check the Key Star website to see if a fuel adjustment kit compatible with your motorcycle is available in the lineup.
POINT
Point 1 – OEM parts for out-of-print vehicles are frequently discontinued, and carburetor parts are no exception.
Point 2 – Key Star’s fuel adjustment kit includes jets and needles for carburetor setting as well as rubber parts such as float valves and O-rings, which are useful for overhaul.